Clients
Creating a client account and walking it through the five-step onboarding.
/admin/clients — every business you work for. A client is the unit almost everything
else hangs off: tickets, projects, content, rankings, reviews, uptime, invoices and contracts are
all filed against one.
#The list
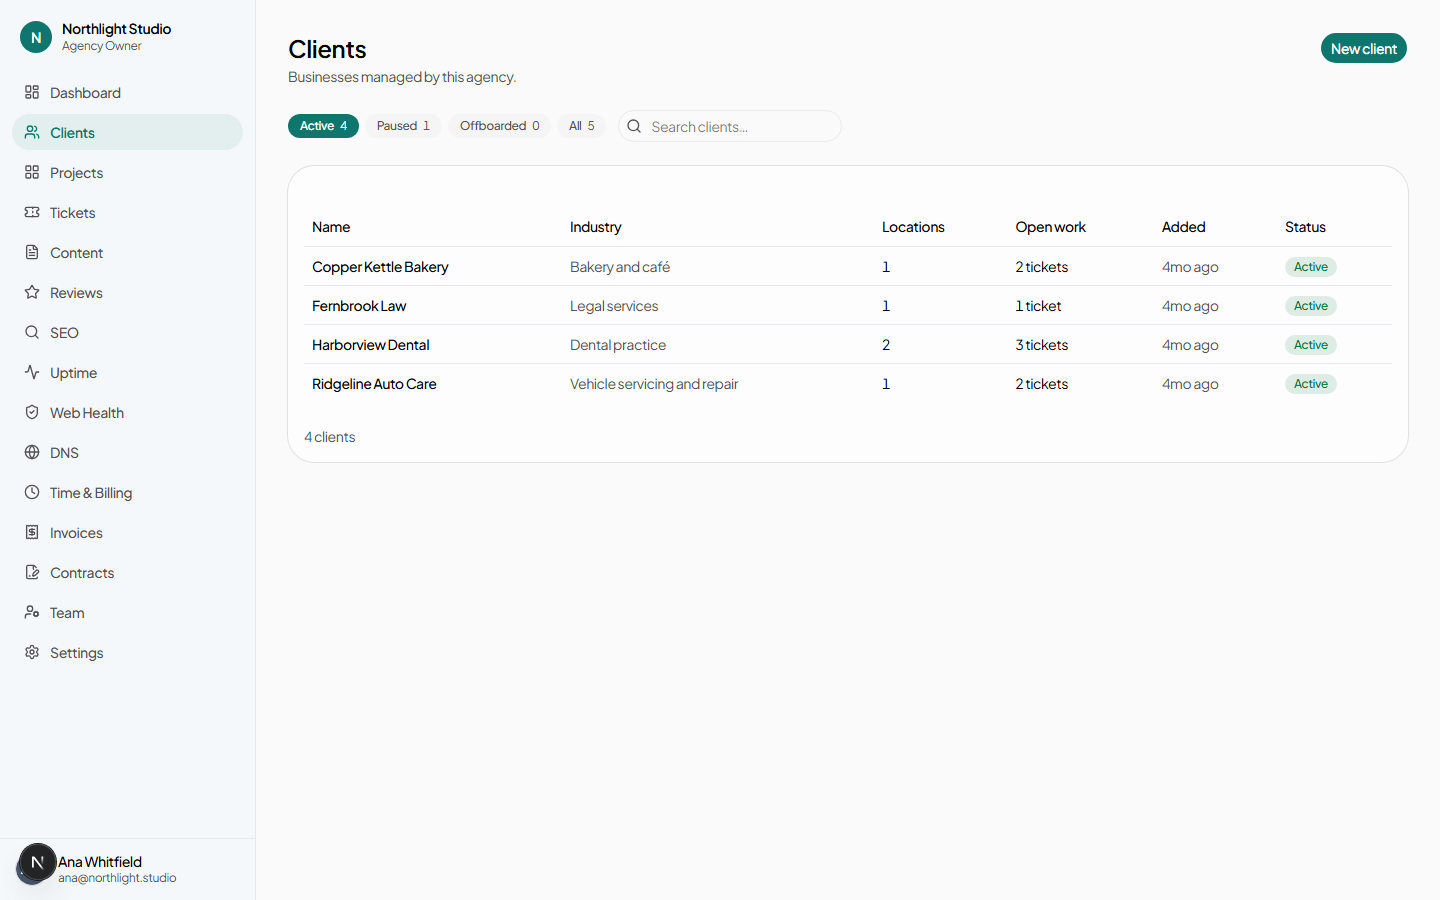
- Active / Paused / Offboarded / All — each filter shows its own count. The default view is Active, which is why a client you paused seems to vanish.
- Search clients… matches on name.
- Each row links to the client, and the ticket count beside it links straight to that client's open tickets.
- Long lists paginate with Previous and Next.
#Creating a client
New client opens a short form. Only the first field is required.
| Field | Notes |
|---|---|
| Client name | Required. What your team calls them, and what they see in their own portal. |
| Legal name | The registered entity. Used on contracts and invoices where the trading name is not the legal one. |
| Industry | Free text with suggestions. Purely descriptive — nothing behaves differently because of it. |
| Time zone | Defaults to your browser's. Used wherever a date is shown to the client. |
| Company phone | Reference. |
| Company email | Reference. Not a login — logins are invited separately. |
Create client saves and goes straight into onboarding rather than back to the list.
#The onboarding wizard
Five steps, at /admin/clients/[id]/onboarding/…. The chips across the top are both a
progress indicator and navigation — each one jumps to its step.
Every step is optional, and progress is derived from records that actually exist rather than from a stored wizard position. Leave halfway through and the checklist on the client's Overview tab tells the truth about what is still missing.
#Step 1 — Locations
Where the client operates. Everything geographic depends on this: local rankings are measured from a location, and Google reviews are collected per location.
Fields: Location name (required), phone, street address, suite or unit, city, state or region, postcode, country, Google Place ID, opening hours, and a Make this the primary location checkbox.
The Place ID can be left blank and found later — see Finding a Google Place ID.
#Step 2 — Websites
The domains you look after. Fields: Domain (required), status (Live, In development, Needs redesign), CMS or platform, and hosting provider.
Adding a website marked Live also starts uptime monitoring for it, and the form says so when it does.
#Step 3 — Contacts
Who to call. Fields: Name (required), type (Primary, Billing, Technical, Other), role, phone and email.
These are reference records. They do not create logins and they receive no notifications — that is step five.
#Step 4 — Modules
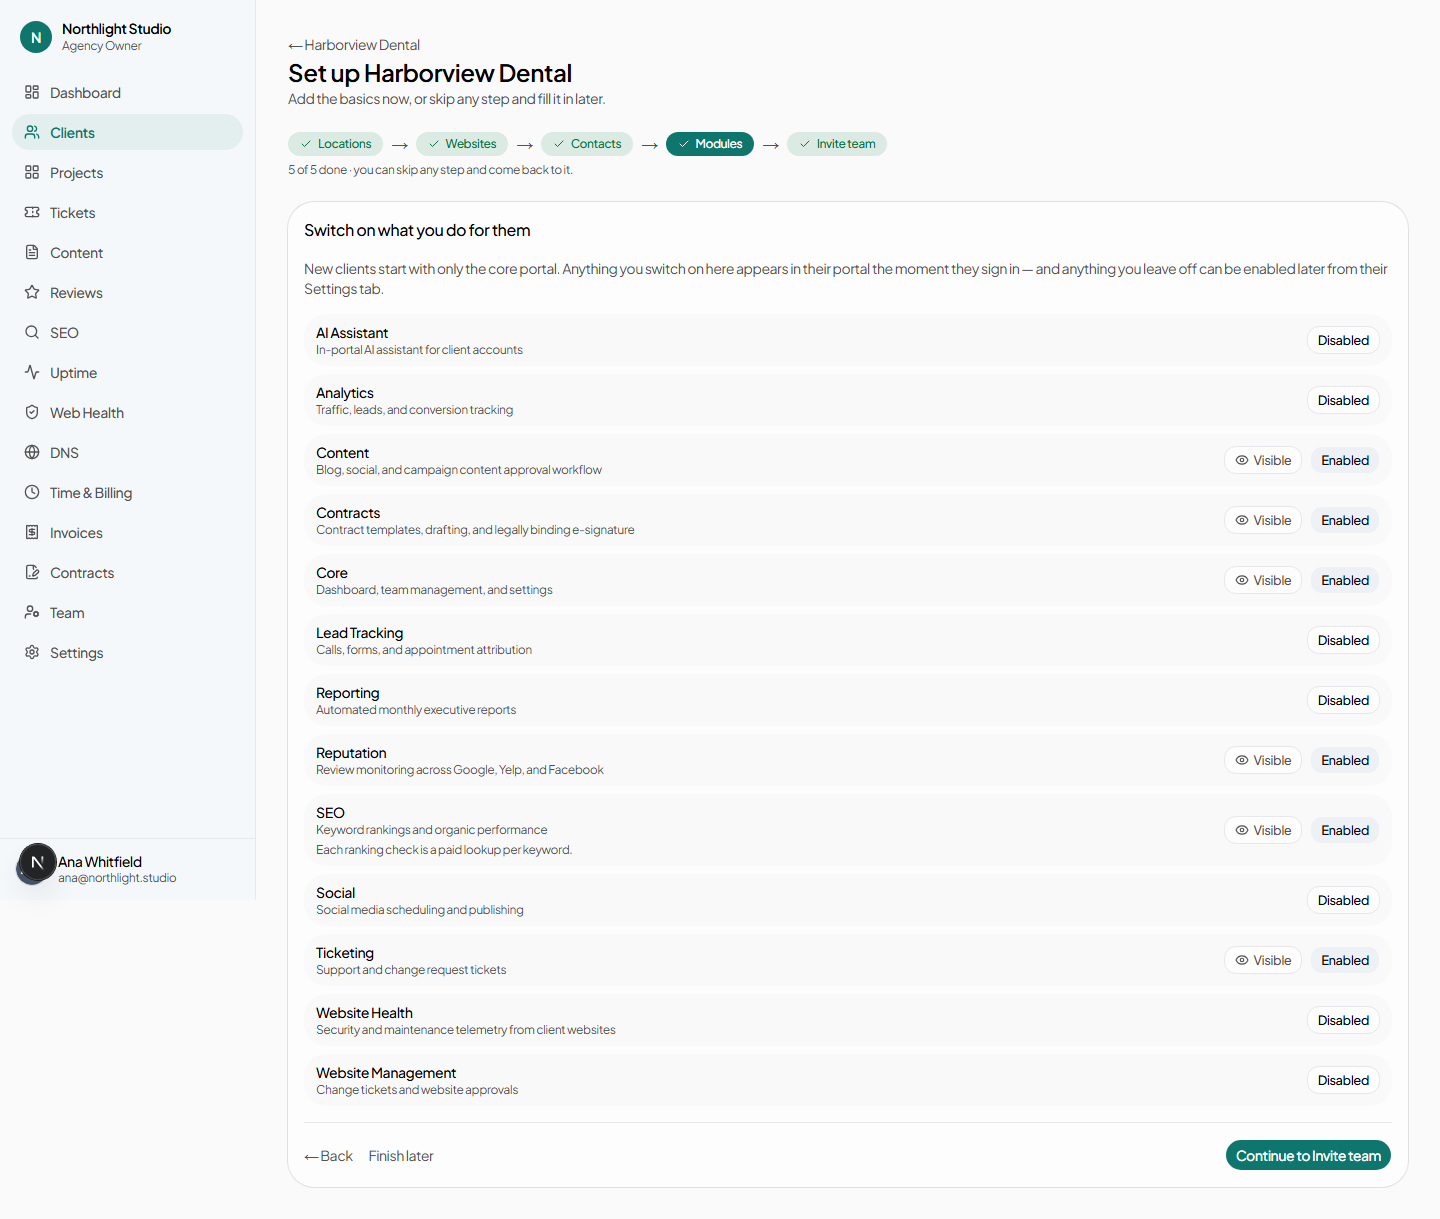
What you have agreed to do for this client. One row per module, each with two toggles:
- Enabled / Disabled — whether the capability exists for this client at all.
- Visible / Hidden — whether the client sees it in their own portal. Only offered once a module is enabled.
Everything except Core starts disabled, deliberately: switching a module on should be the act that says "we do this for you", not a default the client discovers in their portal before anyone has sold it. The full catalogue is in Modules.
#Step 5 — Invite team
The client's own people. Enter an email address, pick a client-scope role, and send. They receive an invitation valid for seven days.
Role choices and what each one can do are in Roles and permissions → client roles. If in doubt, Client Owner for the main contact and Viewer for anyone who only needs to look.
#The getting-started checklist
Until all five steps have produced at least one record, the client's Overview tab carries a checklist card linking back to each unfinished step. It disappears on its own once everything is done — there is nothing to dismiss.
#Next
With the client created, the rest of the configuration lives on the client record itself: SLA, hourly rate, SEO cadence, approval chains, branding and account status. See The client record.